ACCTee – Integrated analysis software for surface measuring instruments
New measurement style with new measurement concept
All measurements and analyses available in one document
Leading-edge operability in the document screen

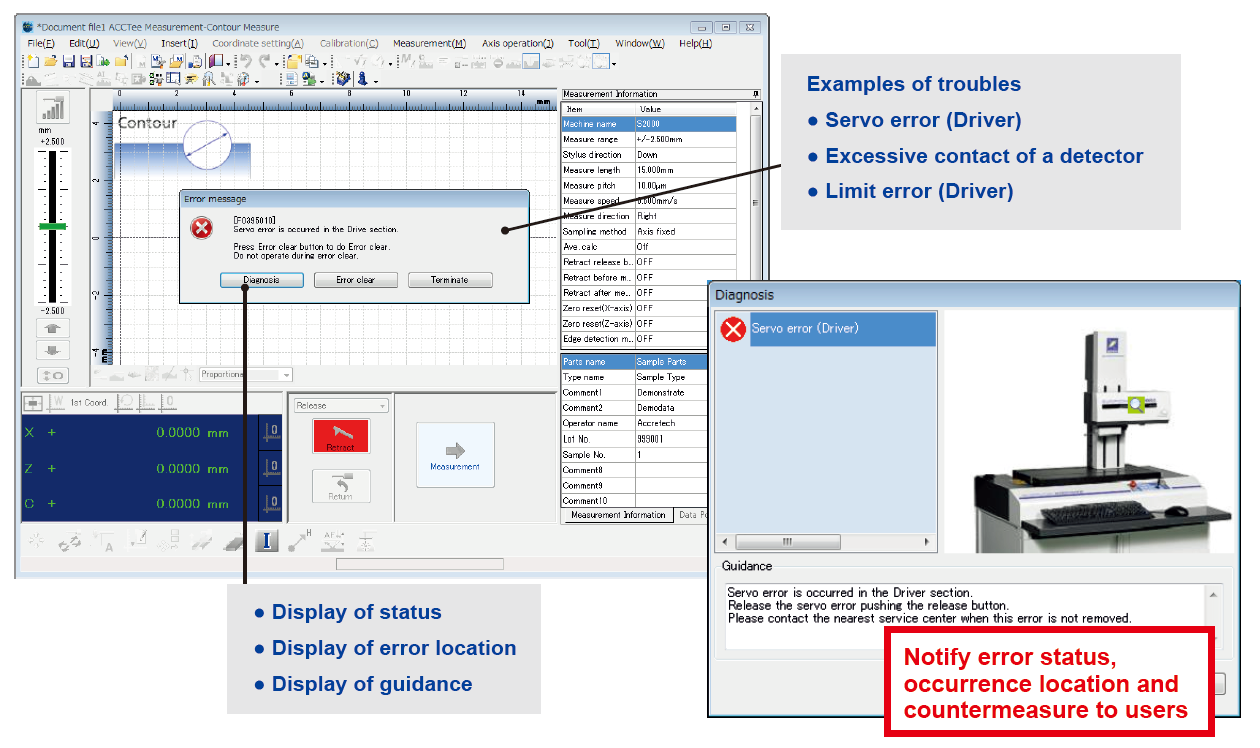
Self-diagnosis function
In case of emergency, the self-diagnosis function is always active. As the support function for handling errors, it displays messages to indicate problems such as measurement screen errors and failures, so that the operator can take appropriate action to resolve the problem as soon as possible.
Efficiency improvement of re-analysis and re-measurement with easy operation
ACCTee holds whole information including layouts, measurement conditions, analysis conditions, measurement data, and part program. This enables the data edit, the addition of analysis contents, the reanalysis and the remeasurement, at will. Unnecessity of window switching improves the operability over 40% compared to conventional manner. In addition to the reanalysis, the repetition of measurement and analysis is easily carried out, by selecting measurement data in data pool and clicking the remeasurement button, for obtaining similar measurement result to previous one.
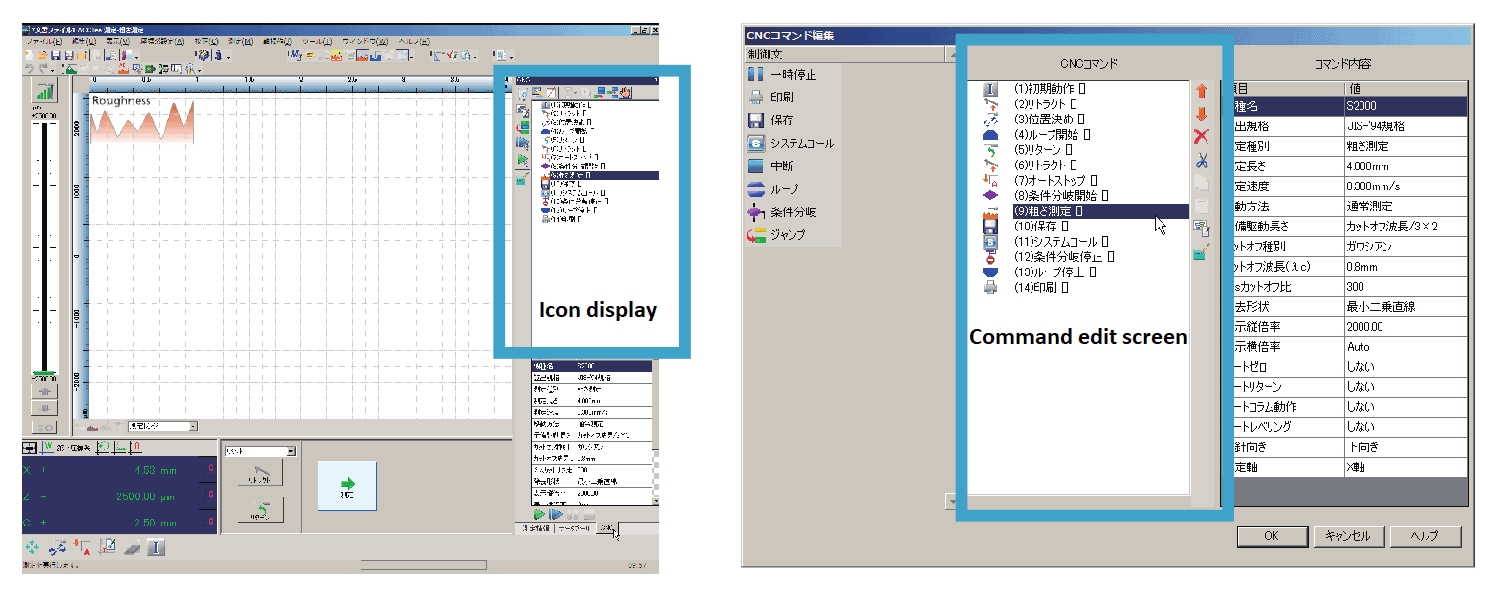
CNC function
This provides a highly efficient measurement work environment, as the series of tasks, from the measurement to the output of the test result, can be executed automatically. For the case and calculation error in the measurement result, operations such as “Jump”, “Pause”, “Stop” and “Continue” can be selected. Using the system call command, you can display any type of image files during CNC operation, and can check the part setup and stylus configuration with photos so that you can avoid accidental errors in advance.
Comprehensive evaluation display document
ACCTee can evaluate an individual parameter using the 16% rule and the design value. In addition, the software can display OK/NG in the graphic image to show an overall evaluation of the whole document. As the master page preparation is registered, the inspection sheet unifying the logo mark and the background will output.
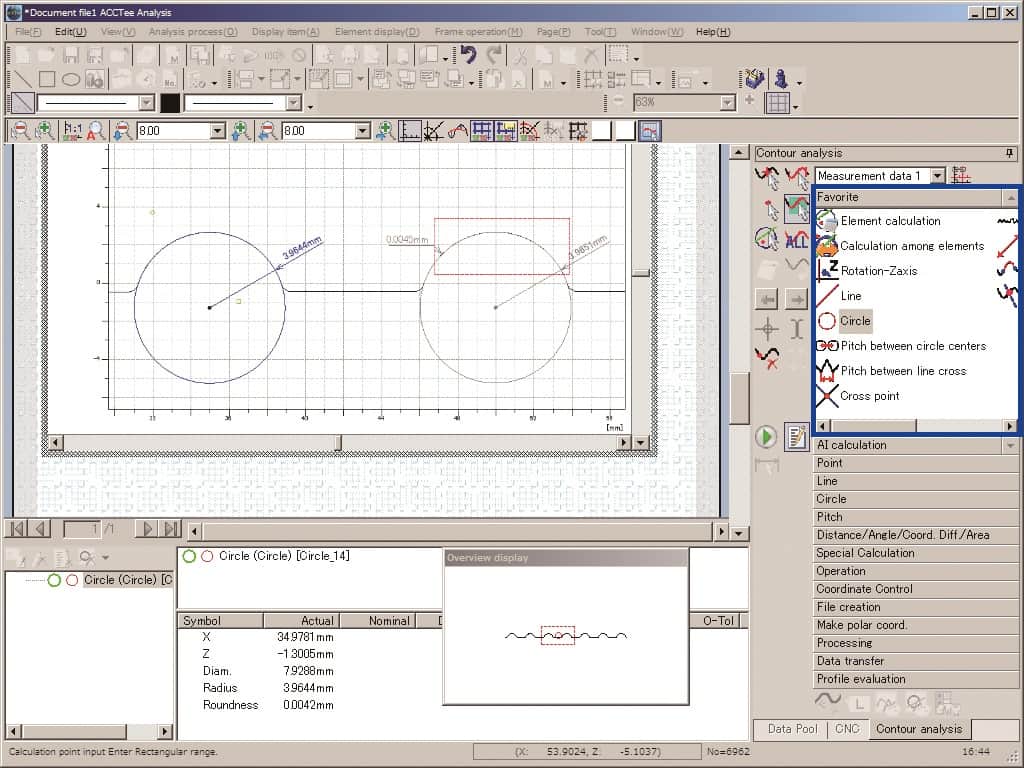
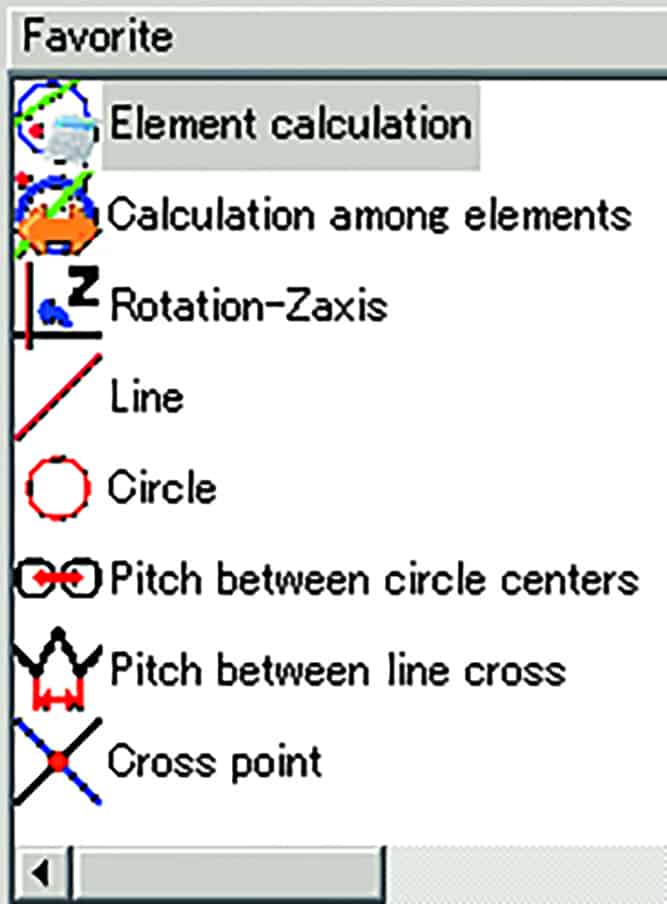
Favorite
Frequently used commands can be stored in “Favorite” and re-organized for easy use.
Multi language support

Help system

ACCTee roughness measurement and analysis system
Roughness measurement and analysis system
This is the standard software associated with the SURFCOM NEX/CREST series roughness system. ACCTee has changed the roughness measurement system with its new concept – the measurement can be executed on a document basis, providing leading-edge workability and an intuitive work environment. As settings can be changed under the guidance of various wizards, anyone can perform the measurement tasks easily and efficiently.
Once imported into ACCTee, measurement data can be displayed on a preview screen where you can adjust various measurement conditions (tilt, cut-off filter, etc). This allows you to optimize measurement conditions and re-analyze as many times as necessary.
Simple operation
A Wizard mode guides users through any measurement operation with easy-to-follow step-by-step instructions. “Favorite box” collects frequently used commands to enhance operability.
Functions such as level difference, area measurement (to measure PC board thickness), and superimposition (to compare wear assessments) are included.
Fully automatic operation enhances operability
Measuring procedures including column up-and-down and tracing driver movement are automatically registered by just clicking re-measurement icon.
Preview function when changing analysis settings
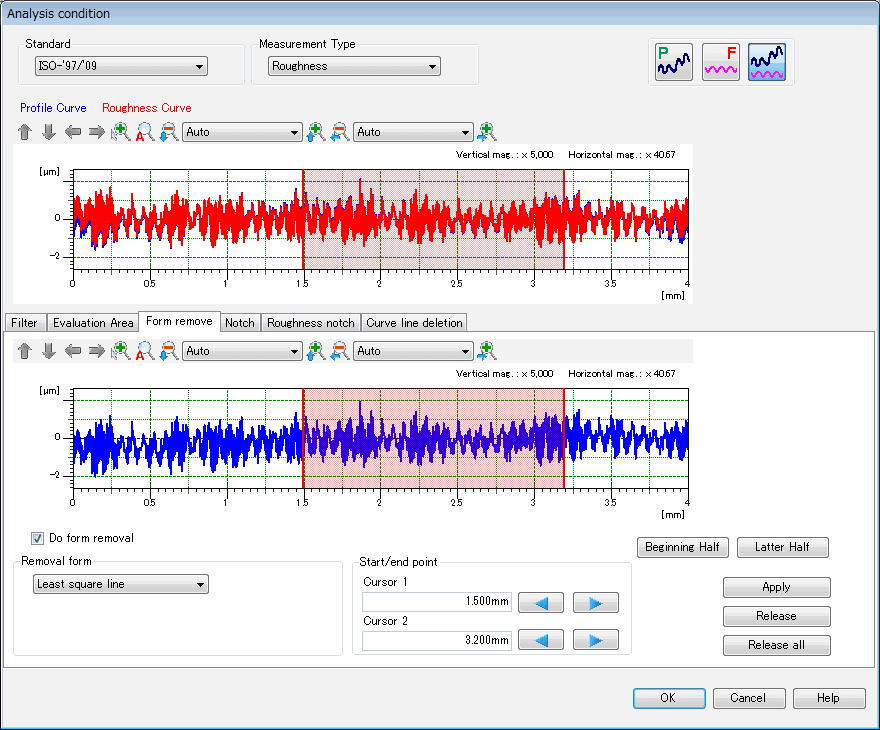
By changing the ACCTee analysis settings, you can set and change the roughness parameter calculation standard, cut-off filter, notch level, deletion length and more. The range of the waveform data used for the roughness parameter calculation can be set to any value. To select the form remove (tilt correction), an optimum form remove setting can be selected as a result of the addition of the preview function. The area and condition specified can easily be cleared.
AI measurement wizard
For the ACCTee AI measurement function, the parameters and analysis settings appropriate for the roughness standard and evaluation purpose can be specified. In addition, the optimum measurement settings can be specified by executing a trial measurement. The analysis item for the measurement data selected on the document can be displayed by selecting the display items at the end.
Pickup calibration wizard
The Calibration wizard is quick to run and ensure that the system is always in a good calibration state. The wizards saves time in the calibration procedure and allow operators to complete the calibration as quickly as possible, meaning the system spends more time in measurement mode than in calibration routines.
Calibration reminder alarm
ACCTee can accept any time as the time of calibration. In addition to the probe replacement time, a message is displayed to encourage calibration based on the frequency of measurements or lapsed days, which guarantees an accurate and stable measurement by ensuring periodic calibration.
Parameter figure and symbol input wizard
The same symbols used in the design diagram can be input into the design values of the analysis condition and parameter pass/fail judgment.
Stylus tip check wizard
ACCTee can use a depth specimen or reference specimen for the stylus tip check. The tip of the stylus gets wear and chips more and more as it is used continuously for measurements. Regular checks are necessary to maintain accurate measurements. Anyone can check the stylus tip easily by following the guidance wizard.
ACCTee contour profile measurement and analysis system
Contour profile measurement and analysis system
This is the standard software associated with the SURFCOM NEX/CREST series contour system. ACCTee completely changes the measurement style of contour profiles with a new concept. Document-based measurements and analysis with leading-edge operability and an intuitive work environment. Each function from measurement to analysis are easy to select and perform, to optimize throughput and performance.
Once imported measurement data into ACCTee is possible to change the analysis conditions (calculation range, etc.), and furthermore re-analyze is possible as many times as necessary by select the optimum condition with the preview function of display the provisional calculation result.
Simple operation
A Wizard mode guides users through any measurement operation with easy-to-follow step-by-step instructions. “Favorite box” stores frequently used commands to enhance operability. “Favorite box” collects frequently used commands to enhance operability.
A comprehensive suite of basic, easy-to-use functions essential to profile analysis enable you quickly and efficiently measure various workpieces with high precision.
Fully automatic operation enhances operability
Measuring procedures including column up-and-down and tracing driver movement are automatically registered just by clicking the re-measurement icon.
Calculation result preview function
When the multiple area input function is turned off, upon the input of the area that can set calculation area freely, the preview for the calculation result and the dimension line is displayed so that the calculation result can be checked beforehand. When the multiple area input function is turned on, the calculation result is displayed at the time of fi nalizing the element.
AI function (automatic element evaluation)
The points, straight lines, and circles of the basic elements are automatically extracted by turning on the AI function and by selecting the specified area of the measurement data. This eliminates the specification of the menu and icon in each case, which significantly reduces operating time.
Elements calculation with icon guidance
When performing a new calculation from any of the multiple elements already created, all possible choices are displayed. Multiple inter-element calculations can also be selected intuitively in accordance with the purpose.
Work trace function
As this function displays a manually traced profile, it is effective for measurements such as understanding the measurement limit point for measuring as far as the edges of a wall or valley when standing at the trace start or end points, or for places where it is difficult to check visually such as inside a hole etc. As the start point and the end point can be specified in the profile traced on the screen, the measurement will never fail. The screen changes to show the real-time status upon starting a measurement, which displays the profile being measured.
Masterball calibration function (patented)
Arc correction calculation

Tip R correction
The tip R correction is also an indispensable element for high accuracy measurement. The measurement surface is captured at the center of the tip R, and an offset correction is made in the normal line direction for the amount of the tip R (radius). (Fig. a) If the profile of the stylus tip R is always completely round, only the R value needs to be corrected, however, other errors may be generated by the correction amount itself due to process errors or biased wear on the tip R (Fig. b). The contour system of Tokyo Seimitsu monitors the status of the stylus tip based on the proprietary algorithm by creating the correction value for each 10 degrees of the tip R.
Stylus calibration wizard
The calibration for the stylus is executed by the masterball calibration unit. Through the masterball measurement and step difference measurement, the tip R correction and the arc error correction can be executed automatically or manually. The calibration is performed following the wizard guidance instructions in the following order: calibration condition (inputting reference value) setting, placement of the calibration unit, confirmation of measurement start point, and execution of calibration.
Profile synthesis function
Even when multiple measurements are required due to stylus angle limitation, analysis can be facilitated by combining the data using the profile synthesis function.
Edge detection measurement
It is possible to set so that the edge part can be detected during measurement and the measurement can be finished automatically. It is effective when you want to measure the far end of the edge part.
Importing external data
It is possible to import CAD IGES/DXF data, and the measurement data* from the coordinate-measuring machine, Calypso Curve, and make an evaluation based on the contour analysis.
* The nominal data to be output by the Calypso option form data, ASCII I/O program.
ACCTee integrated analysis software
The Next-generation ACCTee measurement system has been developed to incorporate the new concept of TiMS integrated software. By enabling the measurement and analysis all on one document, the software provides leading-edge operability and an intuitive work environment for measurement and analysis tasks. With the document-based new measurement style, all of the operations are available on one document (measurement result sheet), and all of the data and information can also be saved with the related data. This is the ACCTee “all in one document” Next-generation integrated software.

